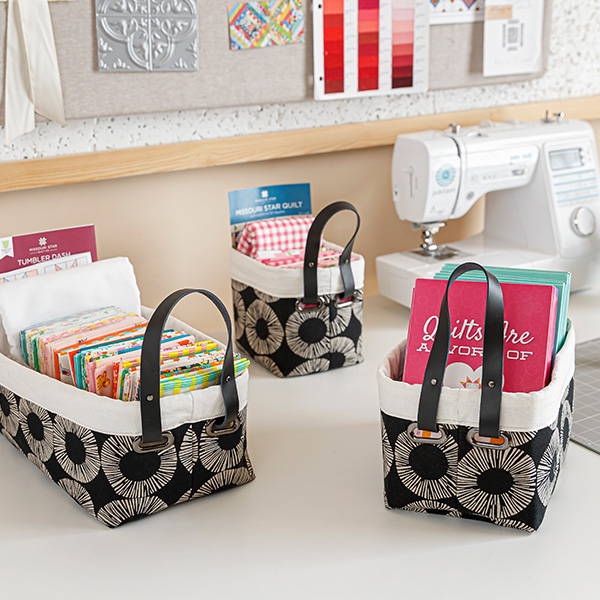
Make Several Sizes Organizer Bins with Handles
by Liz Gubernatis
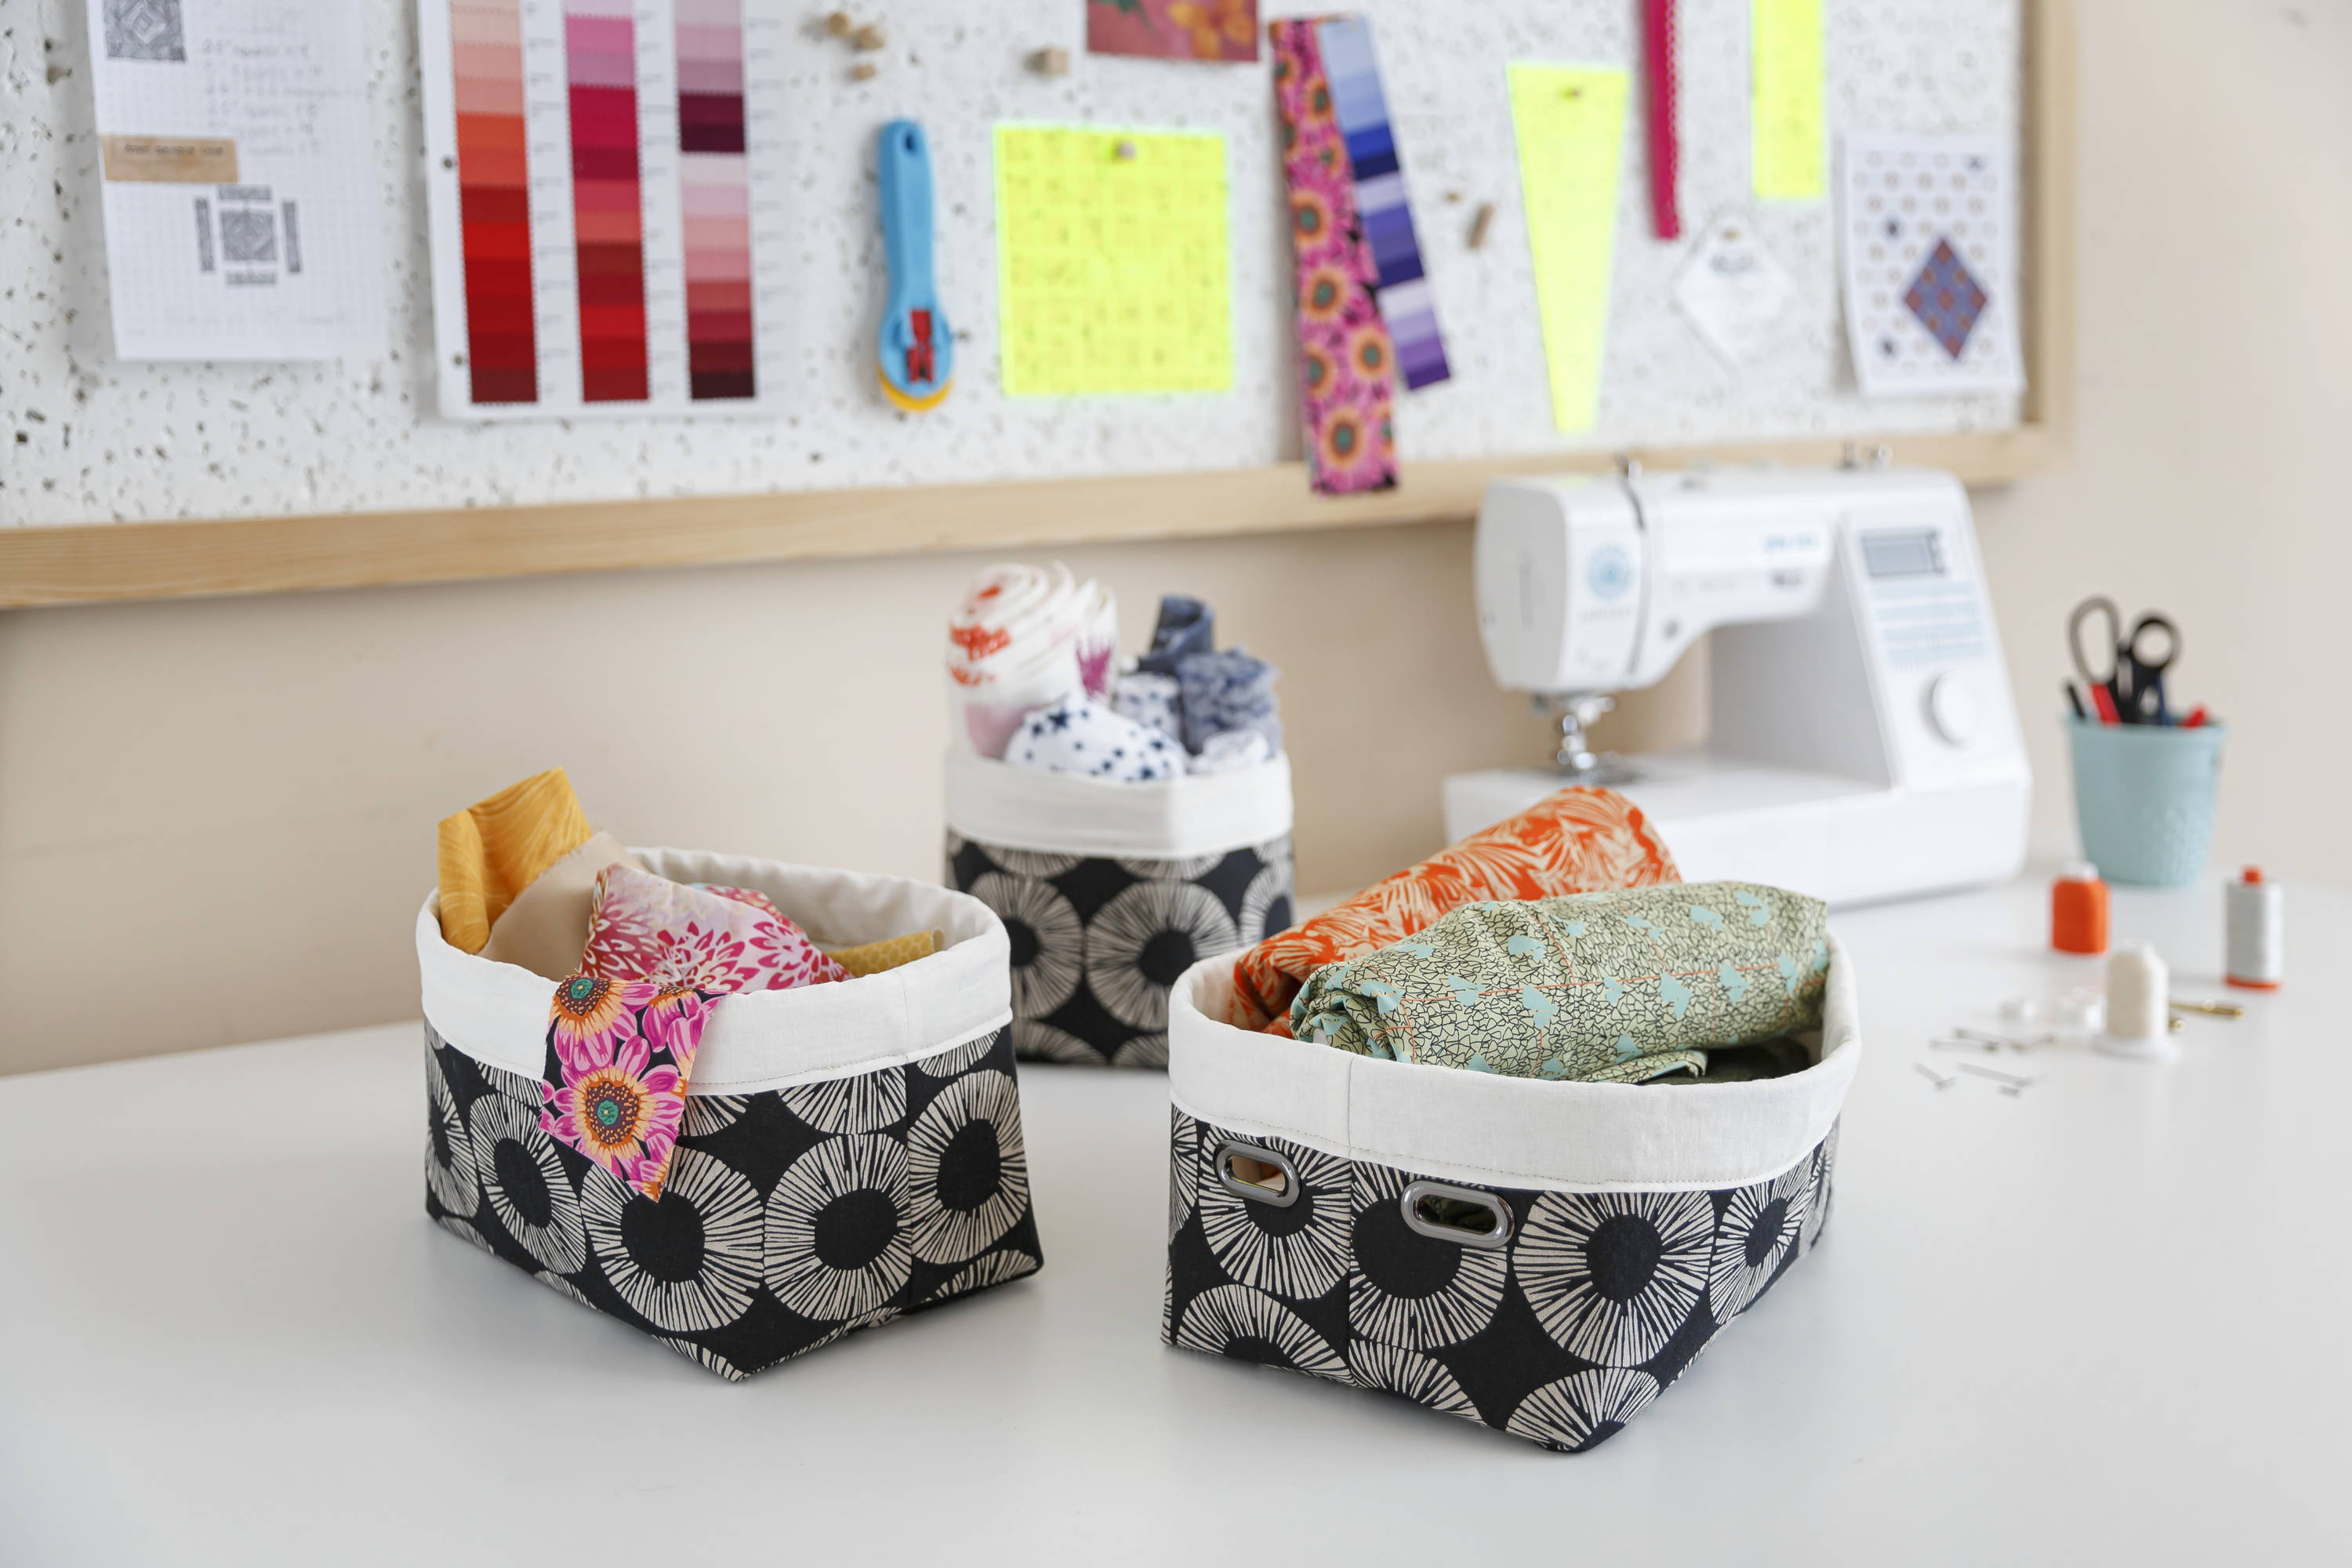
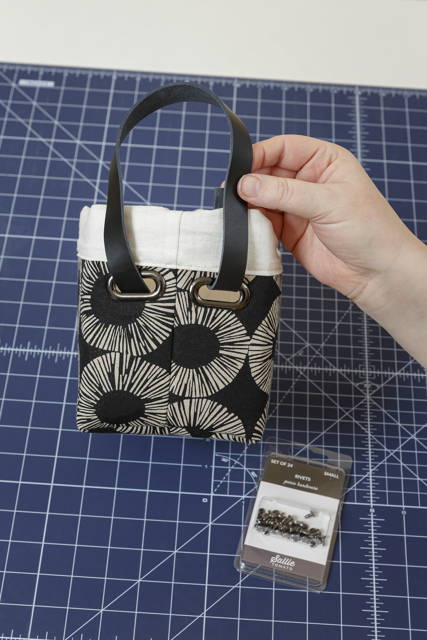
These stylish organization bins can be customized to every style and any room! We used linen blends and leather accents to make a set for our upcoming projects. These would look great in many different rooms in your home or office. What fabrics will you use? What will you organize? Whatever you choose, it’ll be beautiful! Let’s get started…
Small - 5” x 6½” x 6”
Medium - 6” x 9” x 5½”
Large - 7” x 12” x 5”
Supplies Needed
Today, we’ll make the organization bins with a couple of tweaks using the Cuffed Nesting Bins Pattern
To make our set of bins, we used 1 yard each of 2 linen blend fabrics:
We chose a white thread, but you could use any color you like. Our favorite thread for piecing is Missouri Star 50wt cotton thread in white.
Handles are made with leather
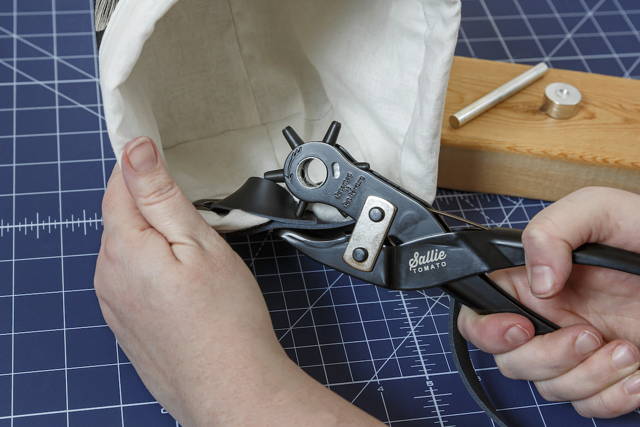
I found this punch tool VERY helpful, but you can use a simpler set of tools
Project Instructions
Cut & Fuse
Step 1
Cut the fabric and foam into the sizes below for each size nesting bin you’d like to make:

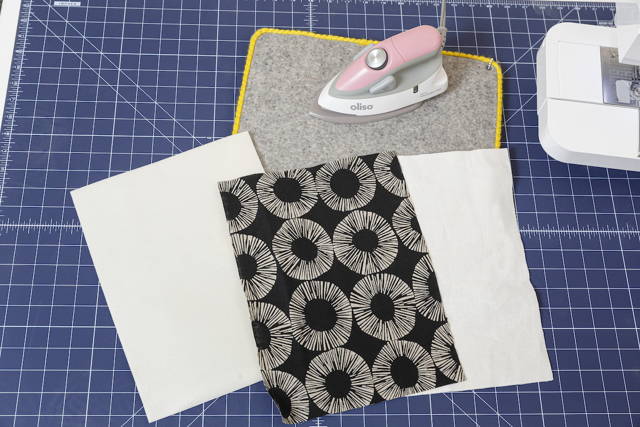
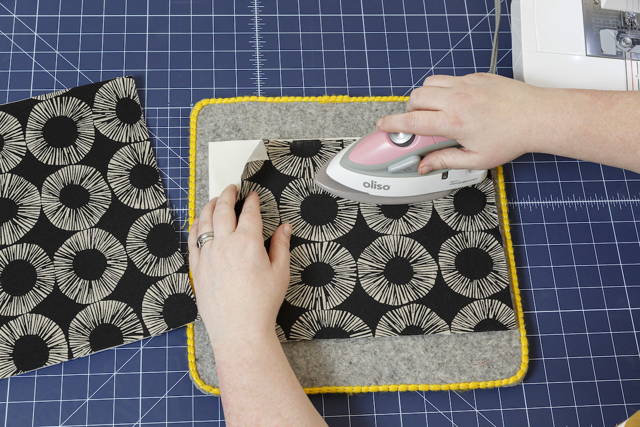
Step 2
Fuse the foam to the wrong side of the main fabric, following manufacturer’s instructions.
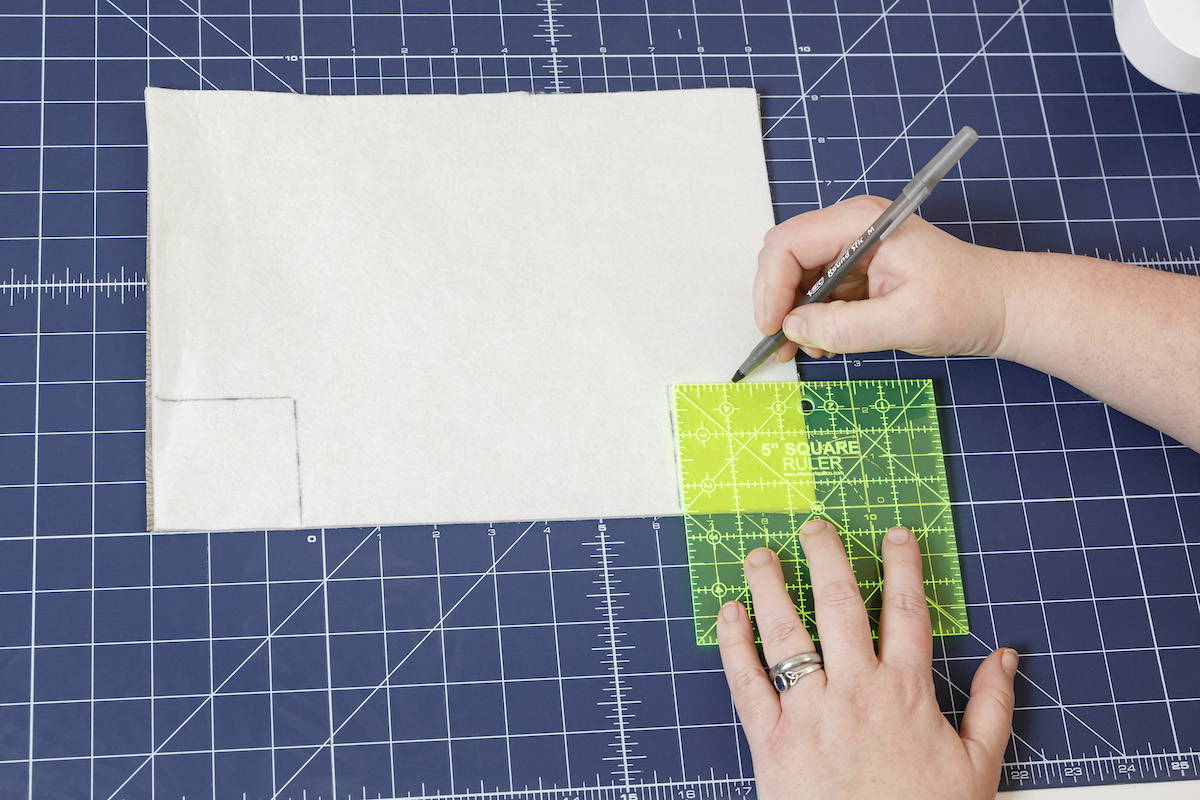
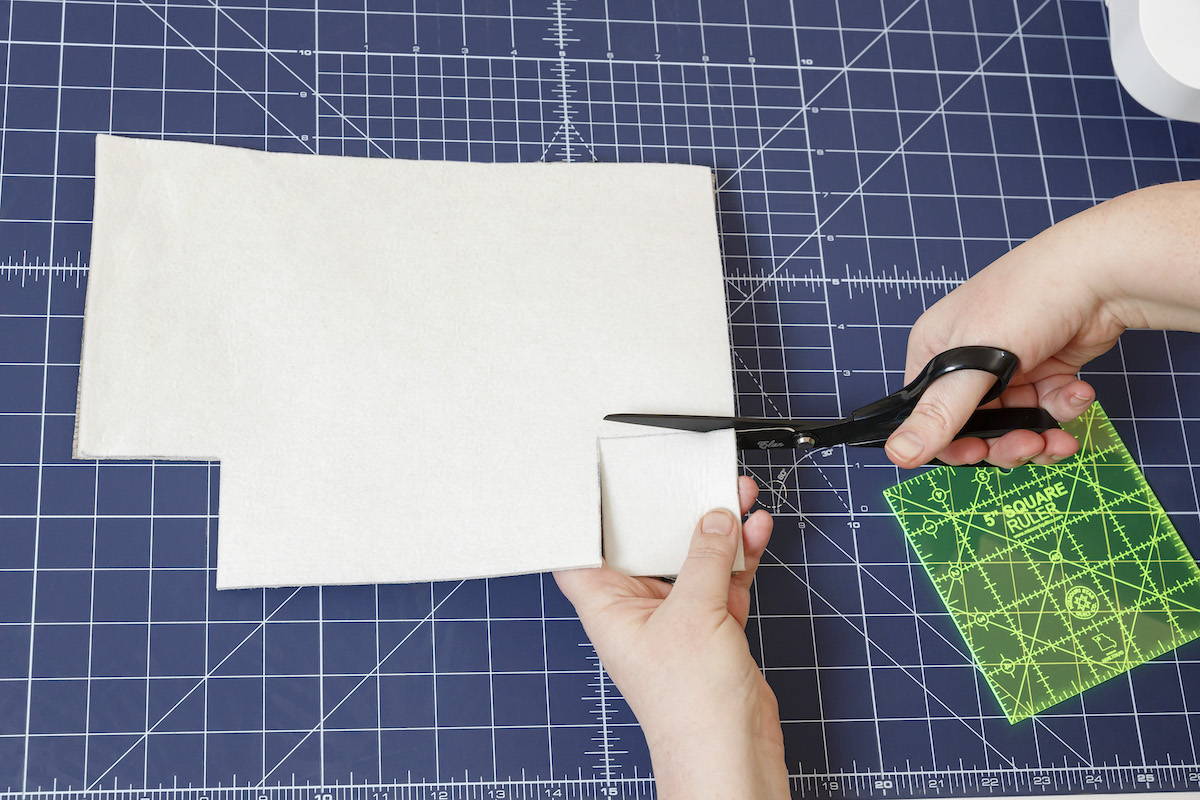
Step 3
Place 2 fused main pieces right sides together. Measure and cut a square from the 2 bottom corners of both the fused main. Cut 2½” squares for the small bin, 3” squares for the medium bin, and 3½” squares for the large bin.
Sew
Step 1
With right sides together, sew the 2 fused main pieces along the sides and bottom as shown using a ¼” seam allowance. Press the seams open. Repeat cutting the squares and sewing the sides with the lining pieces.

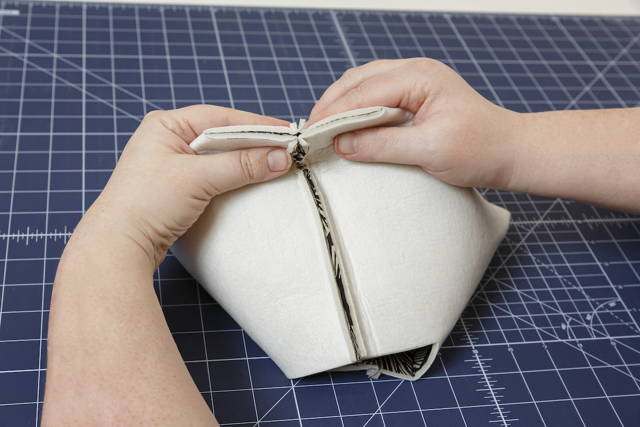
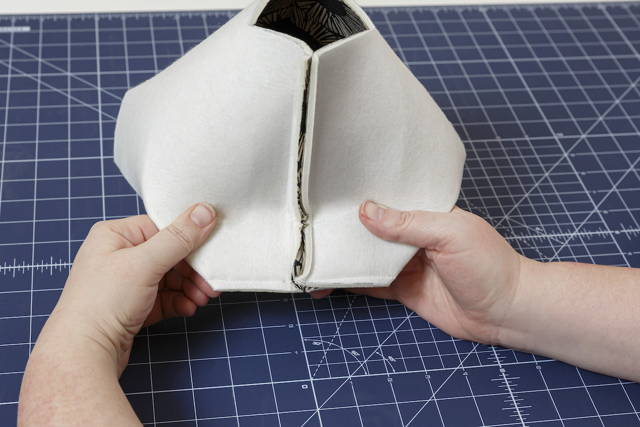
Step 2
To sew a corner of the main bin, flatten a side seam and bottom seam so they are on top of each other. Center the seams and flatten the foam so that the corner seam is a straight line. Stitch using a ¼” seam allowance. Repeat for the other bottom corner.
Repeat with the 2 lining pieces to create the lining.
Finish the Bins
Step 3
Turn the lining right side out, but do not turn the main fabric bin. Place the lining inside the bin so that they are right sides together. Note: The lining is taller than the main exterior of the bin. Line up the side seams of both the lining and the bin and align the top edge. Clip or pin in place every 3-4”, starting at the side seams.
Step 4
Sew around the top of the bin leaving a 3” gap from where you start and stop for turning.


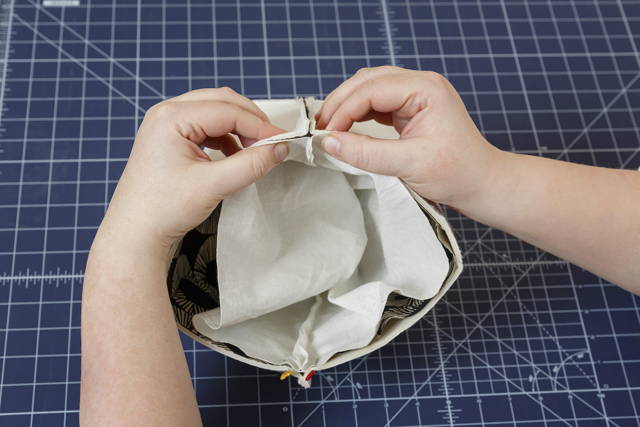
Step 5
Turn the bin right sides out through the gap. Line up the corners in the bottom and pull the extra lining fabric up to create the cuff, extending 1½” beyond the foam of the bin. Press along the fold of the lining at the top edge.
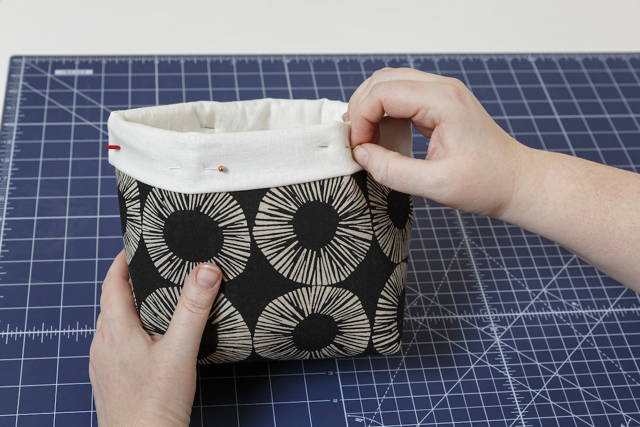
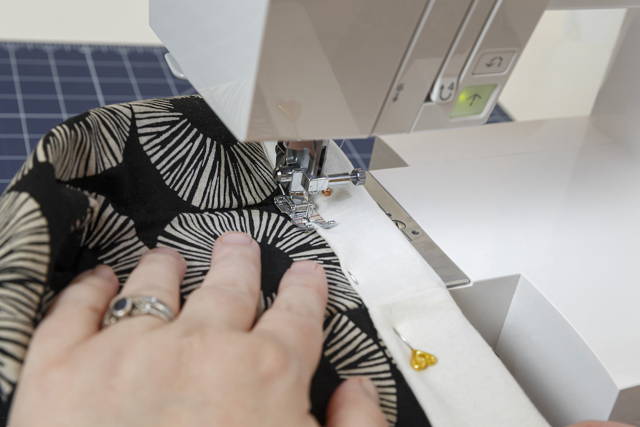
Step 6
Fold the top of the lining over the main fabric until you reach the foam to create a cuff and press. Topstitch along the top edge of the cuff.
Add Handles
Step 7
Using the oblong grommet back as a template, trace the inside shape of the grommet onto the bin approximately ½ inch away from the seam on either side.
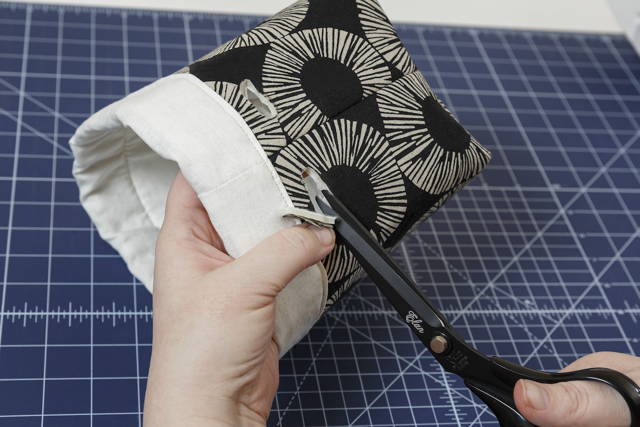
Step 8
With a sharp pair of scissors, clip and snip away the inside of the marked area through all layers (main, foam, and lining)
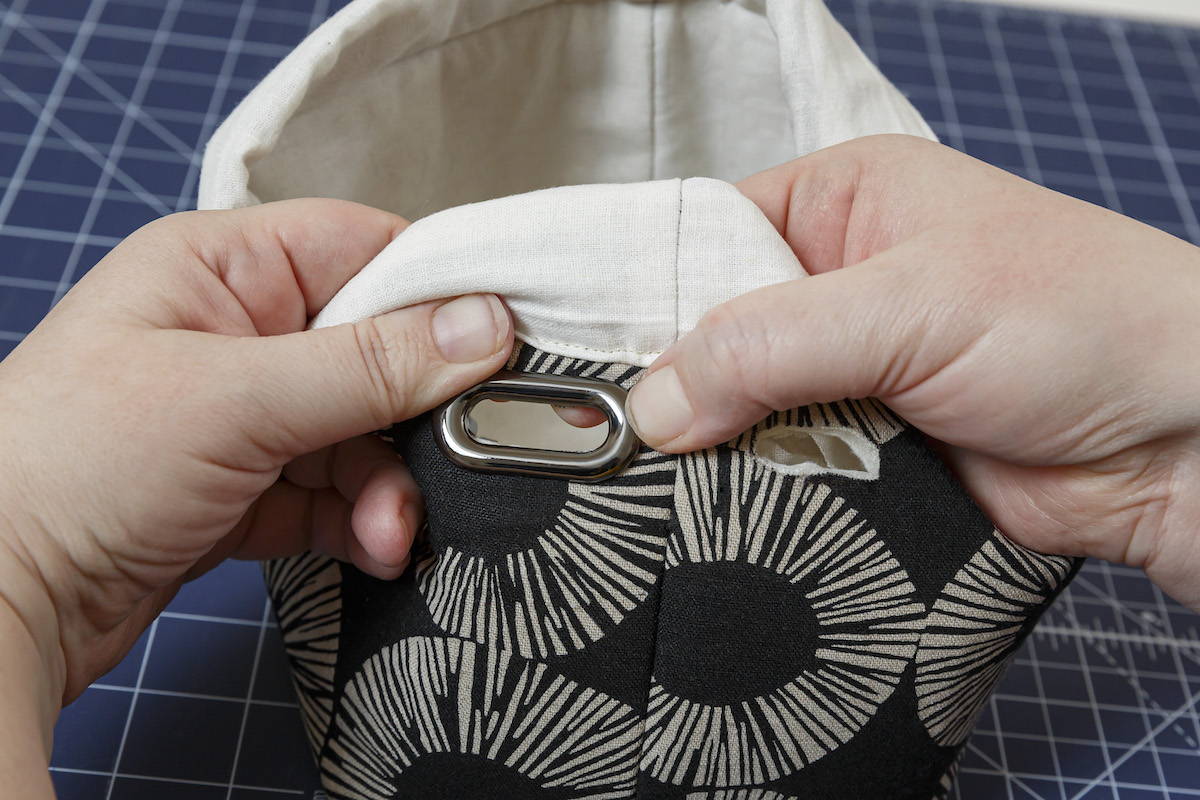
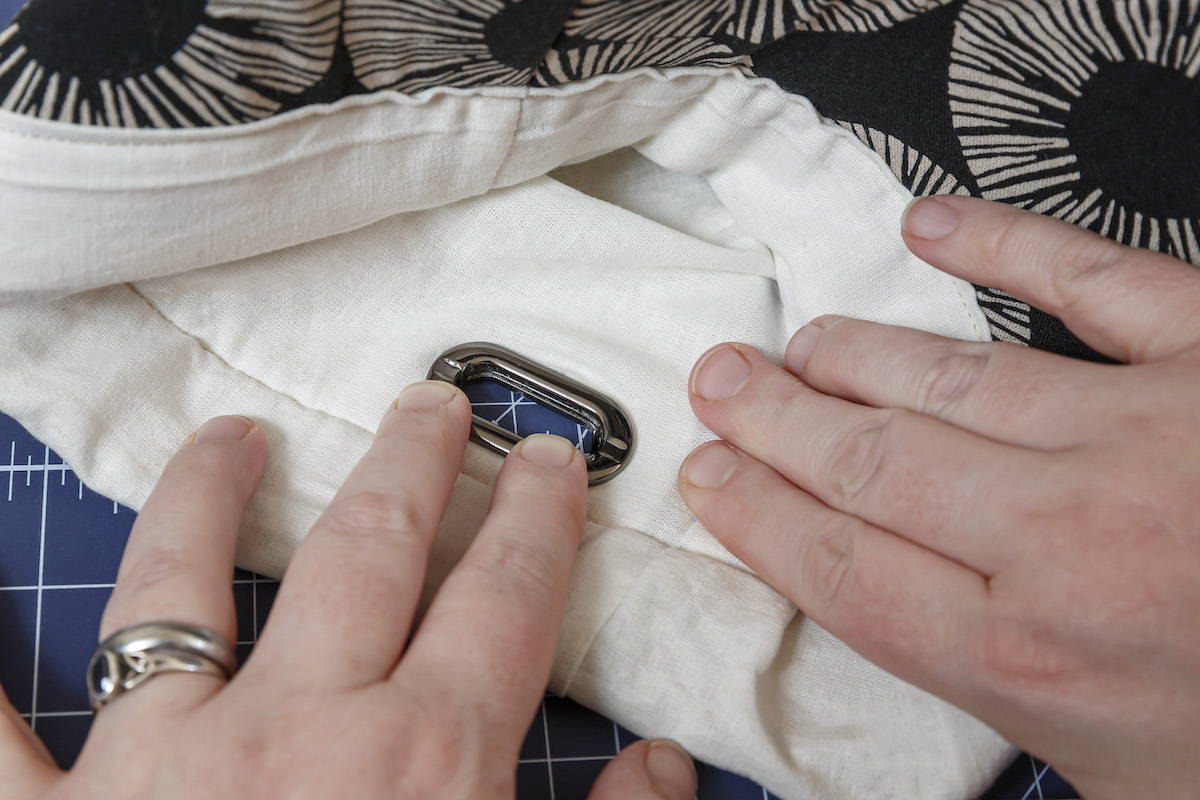
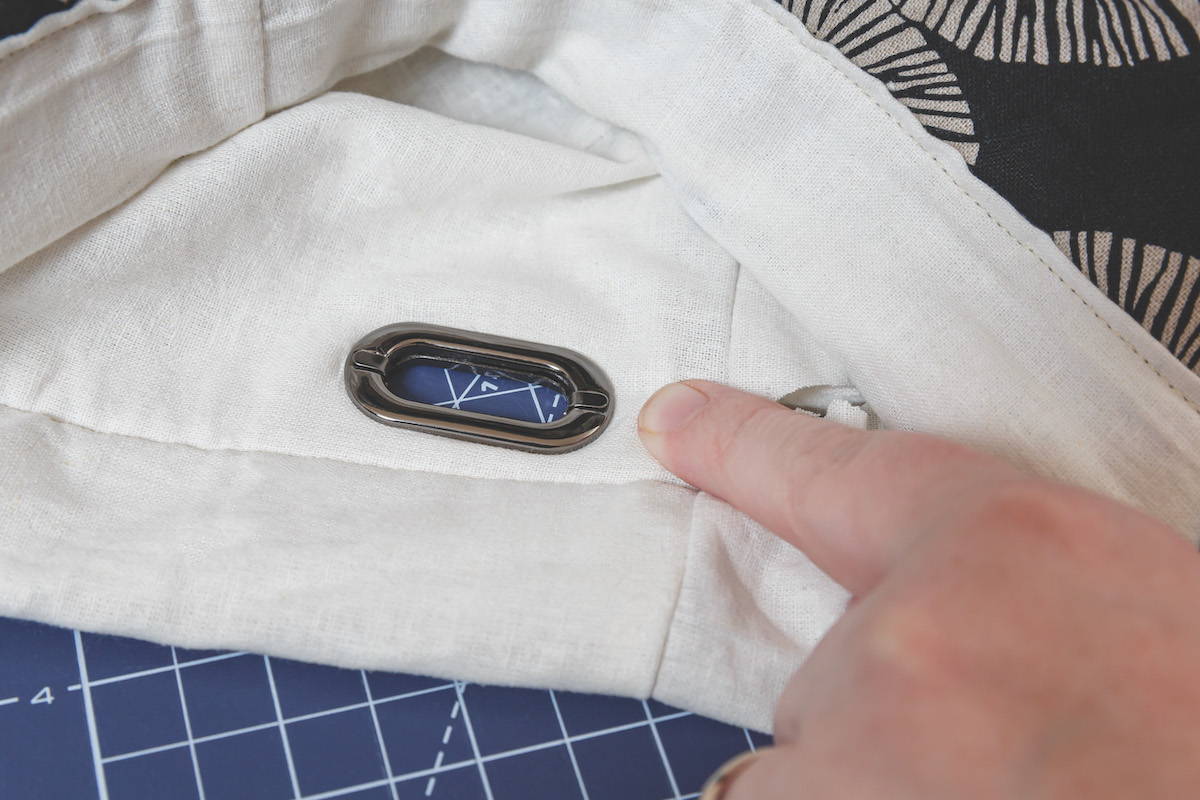
Step 9
Center the cutout around the oblong grommet backing on the lining side, gently pulling the fabric layers into place. Center the oblong grommet top (*with prongs*) from the main side. When happy with the placement, fold the prongs down to secure the grommet in place.
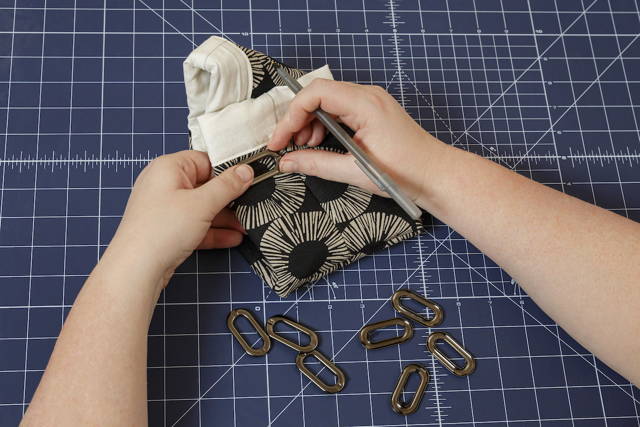
Step 10
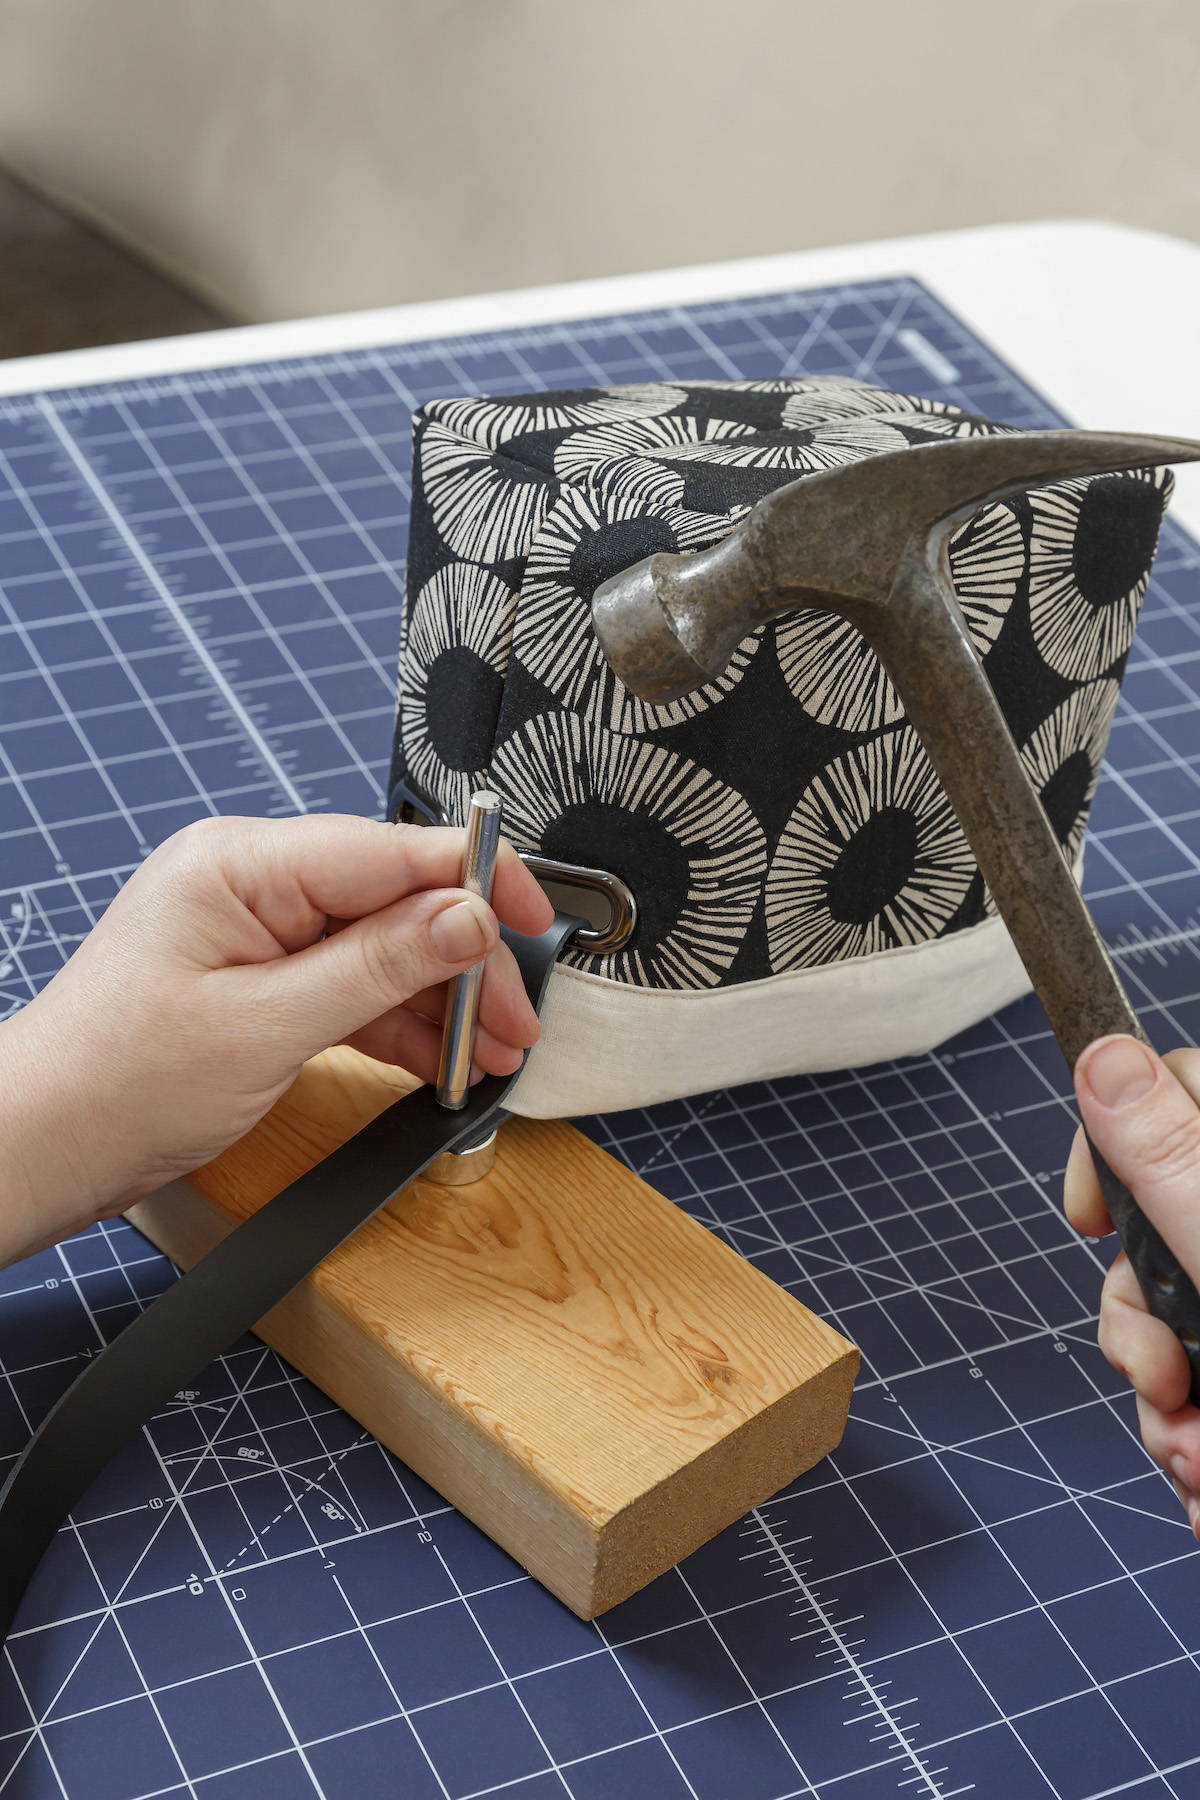
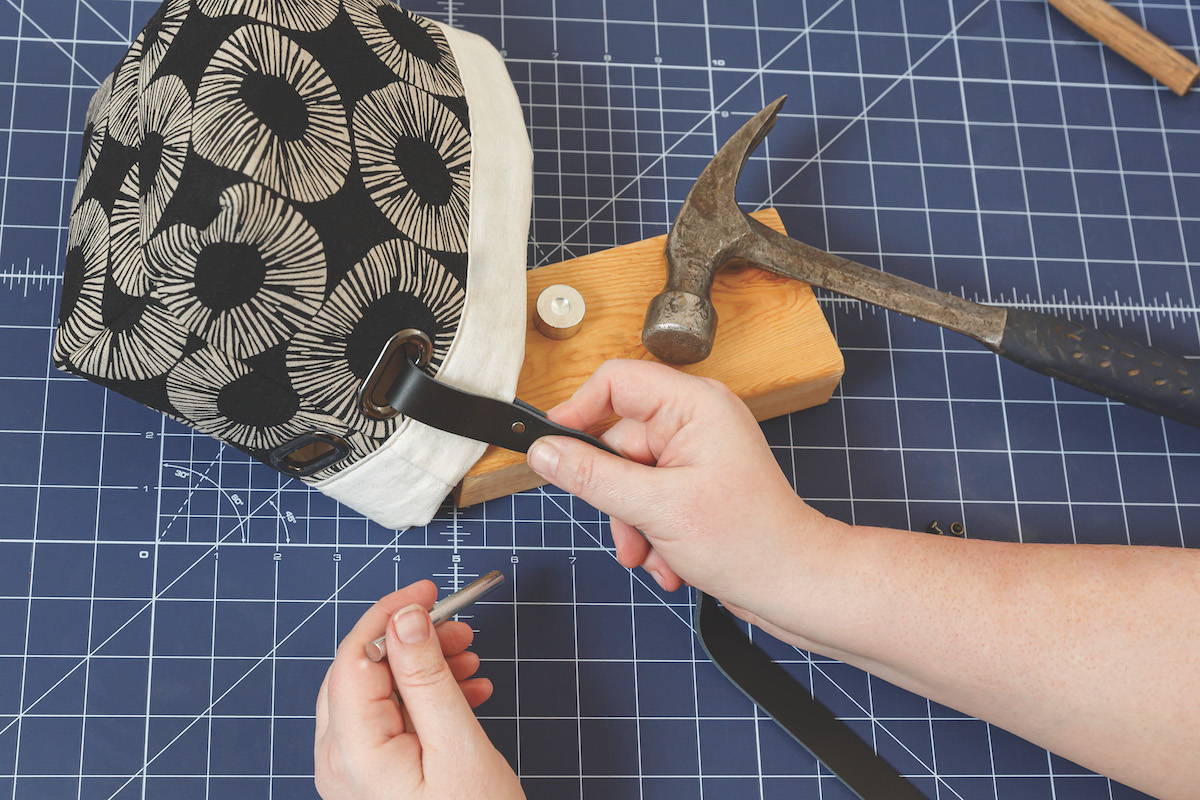
Measure leather strap to desired length. Be sure that ends of the strap will form loops with the main handle. Use your rivet punch tool to center and punch a hole through the two layers of leather.


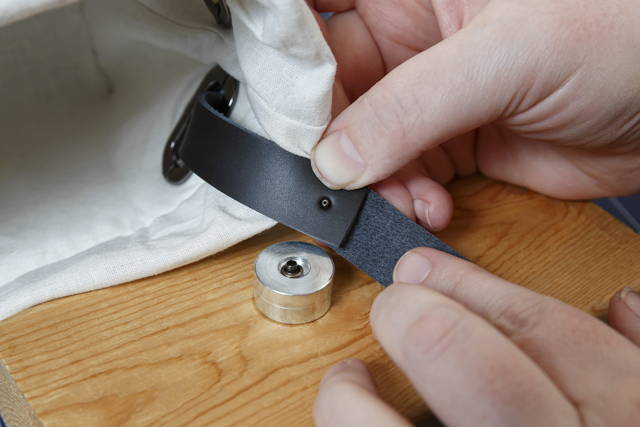
Step 11
Rivets have two halves. Place the rivet half with the post through the leather hole punched. Place the other half of the rivet cap side down into the tool.
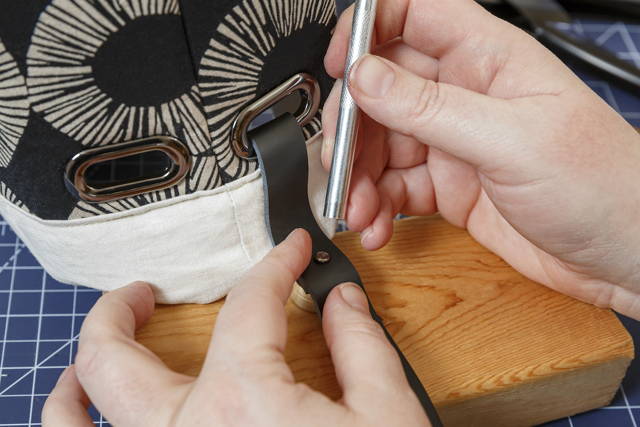
Step 12
Center the post over the cap and gently hold in place. Position the rivet setting tool over the rivet. Using a hammer or mallet, tap firmly to set the rivet.
TIP: Place a piece of scrap wood under your work area so as not to damage you mat and/or table!
Step 13
Rivets have two halves. Place the rivet half with the post through the leather hole punched. Place the other half of the rivet cap side down into the tool.
Voila! A fabulous bin (or set of bins) with handles to hold all kinds of goodies! Will you fill yours with fabrics in the sewing room or will you find just the right spot for these nesting bins in your kitchen, living room or guest bath? We can’t wait to see what you make! Share with us using the hashtag #msqcshowandtell